Case Study: Modular Apartments
3D Printed Modular Construction Units for - Corstorphine Wright O'Brien Architects
When architecture and 3D printing are mentioned in the same sentence, the tendency is to be drawn to the widely shared examples of stand-alone, 3D printed houses. In this context, 3D Printing is frequently listed as a potential solution to worldwide housing shortages: its advantages allowing for quick and affordable alternatives to traditional construction methods. No doubt this work is necessary and will eventually assist in combating major housing crises. However, for developed, high-density urban centres 3D printing at this scale is still a long way off being feasible with any real, wide-scale impact.

3D Printing a House
Modular and prefabricated construction is already a viable solution to many of our housing needs and it’s actively being implemented by architects and construction companies. We were therefore excited to be able to use what 3D printing currently does best (prototyping for those who were asking, or ‘model making’ in architect’s language) to help communicate the benefits of modular construction by preparing and printing a selection of Corstorphine Wright + O’Brien’s Modular Apartment Units.
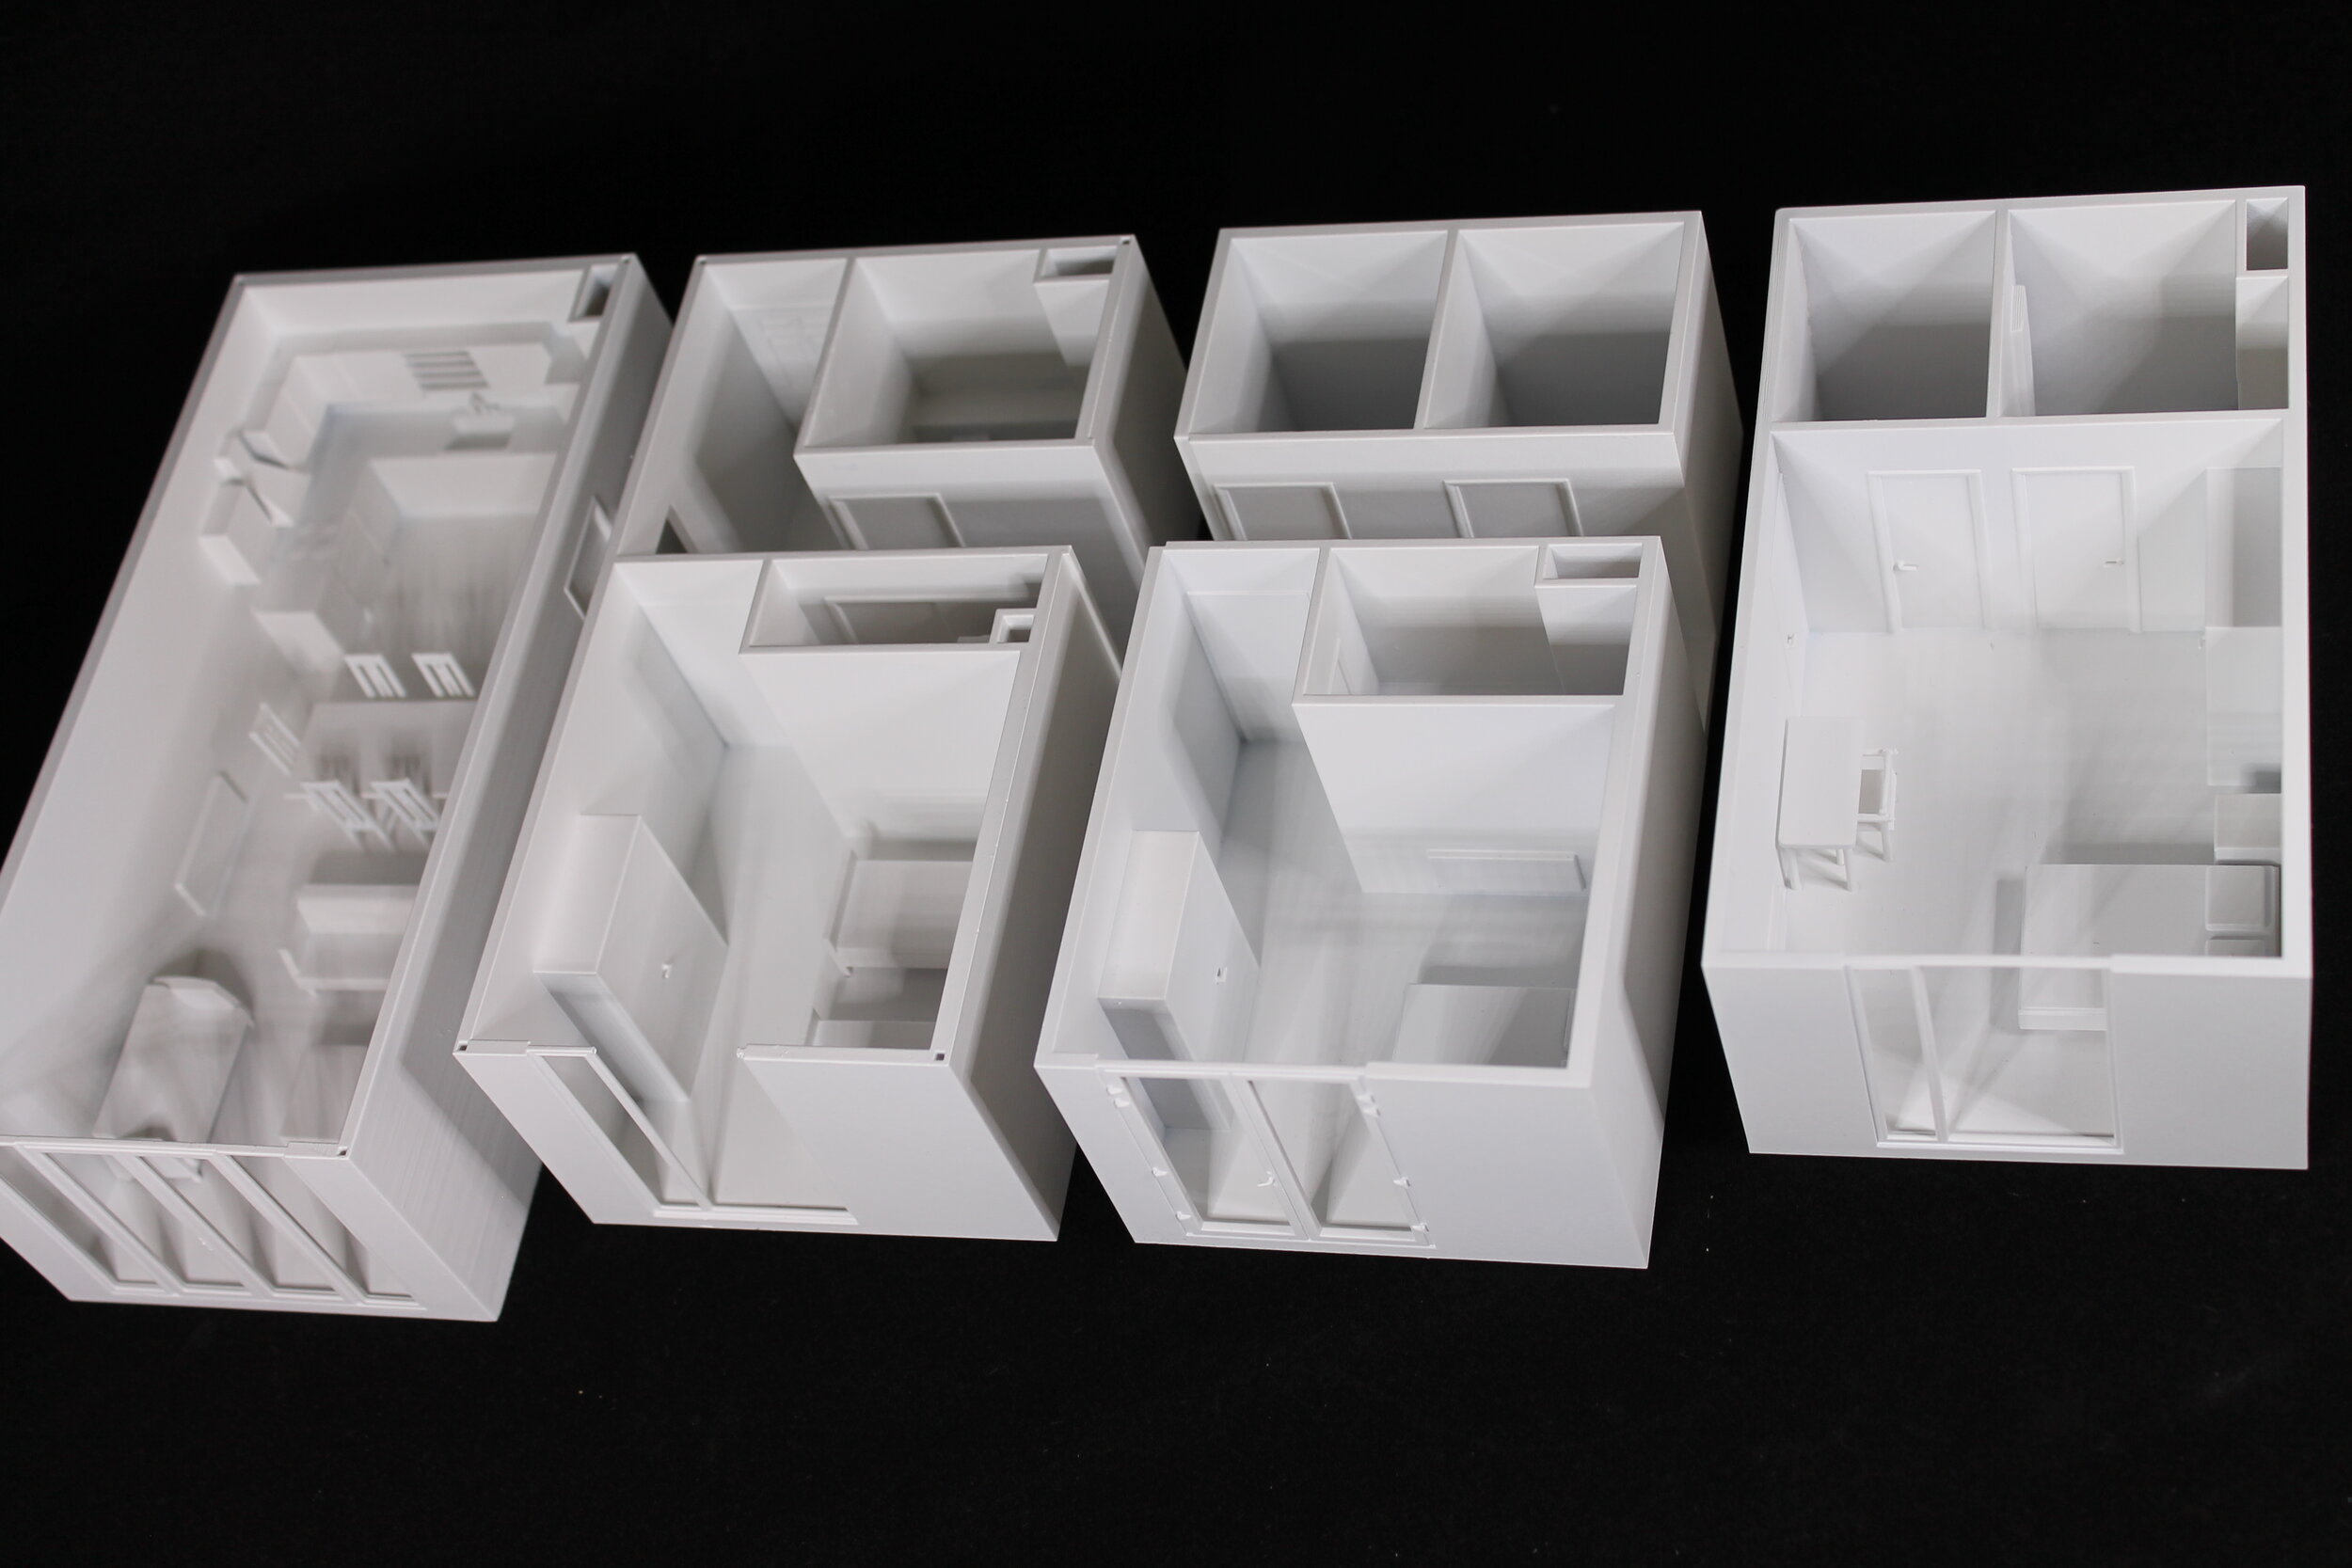
Corstorphine Wright O’Brien is leading by example in the design and implementation of modular building in Ireland. CWO had four different modular units that they wanted to be completed with removable roofs in order to show the internal layouts. The models would be used in varying combinations during presentations. As material finishes of the units weren’t settled we suggested a simple white sprayed finish on robust, resin printed models. A few challenges emerged from pursuing this option, but the end result led to clean, smooth and detailed parts.

C+W O’Brien’s scaled 3D Printed Modular Units being used in a presentation. Source
Our resin printing process produces semi-transparent parts. To spray all of these parts and get an even finish requires uninhibited access to all of the model. The furniture in these modular units would have blocked the ability to spray evenly, so unlike other printing processes where you might print everything at once, resin printing often requires some ‘model design’ - thinking on how to split up the model, so that it can be post-processed (support removed) and spray finished before being reassembled.
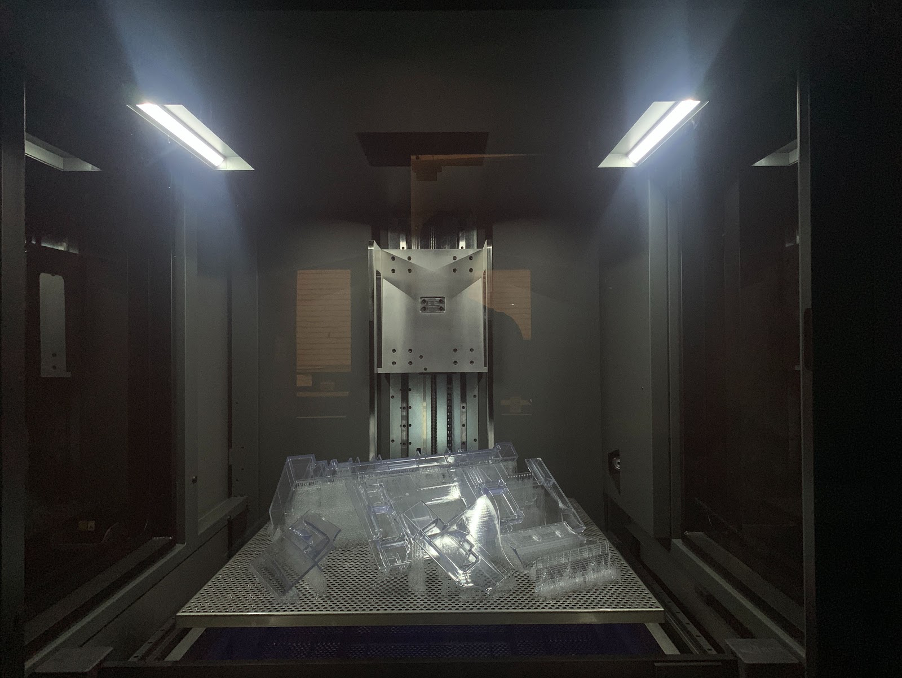
A completed build of clear resin printed architectural model parts. The support structure that will be removed can also be seen. The build volume of this machine is 800mm x 800mm x 600mm (RPS NEO 800)
The digital models supplied were of a very high quality (of course!), however, our job at Fixie is to make sure elements survive 3D printing and post-processing, a perfect architectural model (and we’ve seen our fair share of less than perfect files!) is very different to a 3D printable model. This process involves thickening certain features e.g. door and window frames. These kinds of details add to the finished model so there is an element of creative licence to accentuate these beyond their actual size. Model making is after all a representative medium, no matter how much 3D printing allows you to get as close as possible to the real thing.
Furthermore, we have to make each unit one single shell for 3D printing. Often the model, no matter how well thought through will contain many separate meshes for walls, cupboards, doors etc. It’s our job to merge these seamlessly using our file fixing software. Understanding the client’s design objectives is always a guiding consideration in this process.
The furniture was separated from the rest of the model and ‘booleaned’ from it. This process allows for small location points to be present on the model to accommodate glueing during reassembly.
Windows were removed to be clear voids to allow more aspects into the interior of the model (these could also be glazed in clear acrylic).

The fixed digital models (each part is a single shell)
The most technical issue was how to drain uncured resin from the 3D printed parts - all 3D printed parts are hollowed where possible to reduce the material usage. However, this can mean that uncured material is trapped within the model. A simple way to allow this to drain away is to create small holes which can then be plugged or filled before being sprayed to conceal this manual effort. Normally we would hollow parts/buildings from the underside so that you wouldn’t see it at all in the final model, due to the fact that the pieces would be fixed to a base. Or alternatively, the parts are printed solid because they are of a delicate form or size.

Roof parts and furniture pieces after printing
With these issues addressed, we 3D printed (Overnight), let the uncured resin drain away, removed any supports, washed the parts in isopropanol to remove any surface coatings of resin, cured in our UV oven to make the pieces stronger, bead blasted the parts to give them a perfect finish for spraying (the next morning), filled the resin drain holes, spray finished the parts and then glued furniture back in place (that afternoon).
Unit cost for production in this manner (File preparation, 3D printing, spray finishing and assembly): c.£325/€375 each (+VAT and Delivery).
These models could also be produced in full colour directly in the printing process using our colour jet printing (gypsum powder) and multijet fusion (nylon powder) technologies. Please get in touch to understand more about these options.